
Workflow Configuration
Workflows are used as one method of enabling communication between content authors and editors. Not all page editing processes are equal. As a site admin, you can define one or more custom processes that allow some pages the require extra scrutiny before publishing.
Workflow Overview

New workflows are created by clicking the Add Workflow button 1.
Each workflow will appear on its own row in the dashboard. You will find the workflow name 2, description, the count for required approvals 3, which users or roles can issue approvals 4, and which pages can use the workflow 5.
There are several actions that you can take to manage your workflow 6:
- Configure - This allows you to edit the approval and page lists
- Delete - This will immediately delete the workflow and all related historical information.
You are able to add an unlimited number of workflow options, however, we recommend not to have more than one or two options per page type to avoid complexity and confusion by page authors.
Adding a new Workflow
Clicking the Add Workflow button will display the add new workflow window.
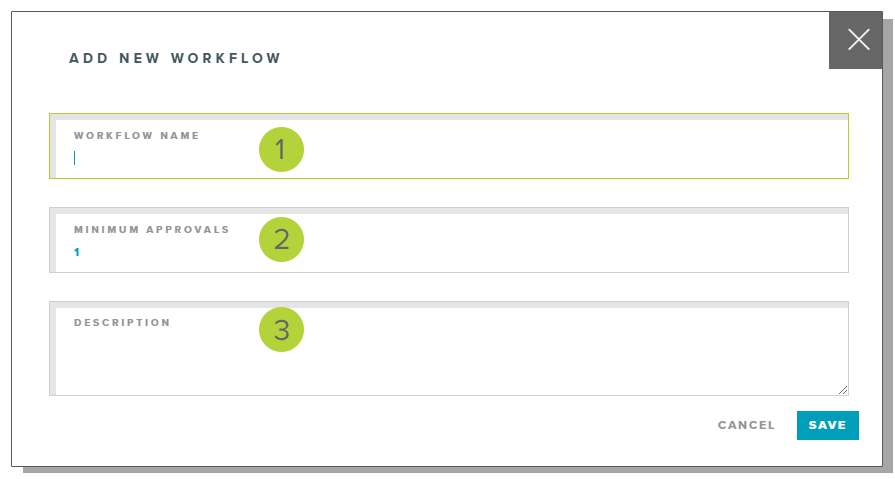
Each workflow must have a unique name 1. This is the name that will be displayed to page authors when selecting a workflow during an approval request.
You may set the number of approvals required 2. This must be at least one. You may set any number you wish, but keep in mind that the more approvals you require will make it more difficult for authors to publish pages.
The description 3 is available to help you remember the intent of the workflow and a description of what the approval process should be. This is for your information only.
Click save to add the workflow. Clicking cancel or the 'X' button will close the dialog and no changes will be made to the system.
Configuring a workflow
Clicking the gear action button for a workflow will open additional configuration options.
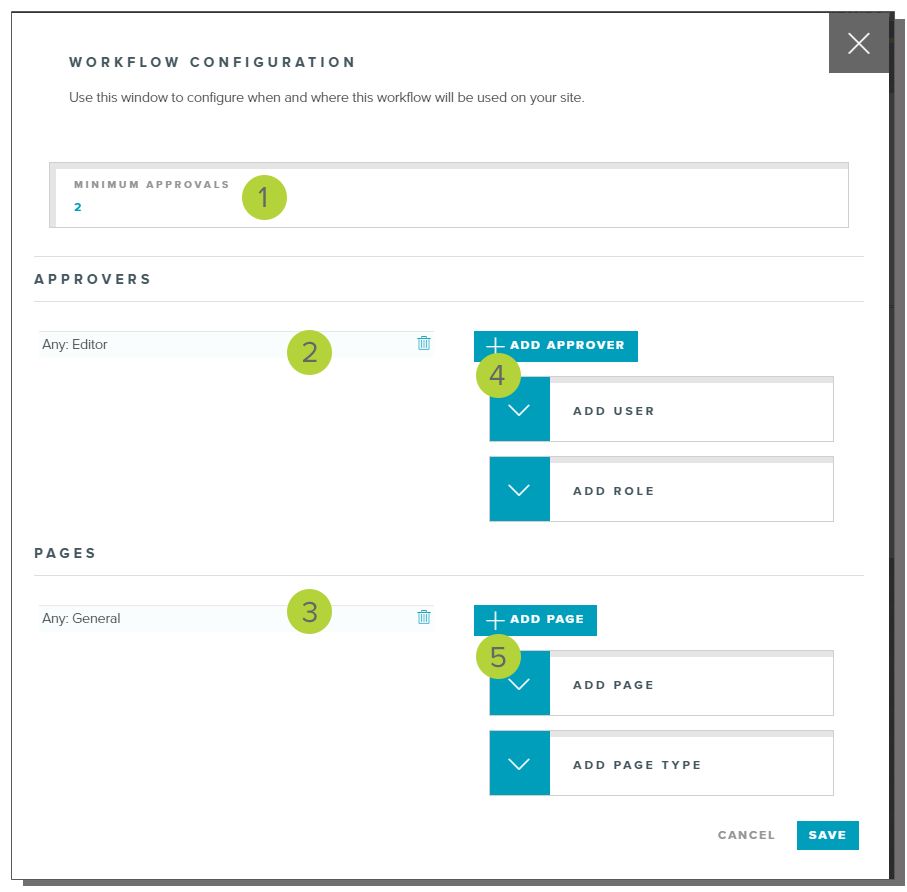
You may adjust the number of required approvals 1. This number must be at least one, and represent the number of people in the approval list that must approve or reject a page before the workflow can be completed.
You will see the list of current users or roles 2 that are available to take action on the workflow. You can remove an approver by clicking the trashcan icon next to the user, or add a new approver 4 by clicking the 'Add Approver' button. This will expand a dropdown section where you can add an individual user. or add a role to allow any user having that role to make approvals.
You will see the list of pages 3 to which this workflow is available. You can remove a page by clicking on the trashcan, or add new pages by clicking the 'Add Page' button. This will expand a dropdown section where you can add an individual page, or add all pages of a specific page type.
LAST UPDATED: 5/28/2019