
Link Editor
The link editor is used whenever you are adding or setting the URL of a web link. This can be for a text link, menu, button, image or any component that will send the visitor to a new page when they click on that link. The editor allows you to configure nearly any type of link, whether that be to another page on your website, an external site, send an email, do a site search or even to dial a phone number (on your mobile phone).
Editing Links
The link editor is used to configure web page links. These links normally send the browser to a new page, but in modern sites, they can perform many other actions. The following is a list of the different types of links that the link editor will allow you to create.
- Site Page - Sends the visitor to a different page on your website
- Document - Downloads a document from your media library (ie PDF or Docx)
- Search Term - Sends the visitor to you site search page with a specific search term in mind (ie Food)
- External Page - Sends the visitor to a page on an external website
- Email Address - Opens the visitors email application and starts a new email to the address provided
- Phone Number - On a mobile phone, dials the number provided
- Text Message - On a mobile phone, starts a text message to the number provided
- Child Pages (Dynamic) - Automatically populates menu with links to child pages (of this page or another)
In addition to the link type, links are normally displayed with a title or description of where the link will take the visitor. This value can usually be edited directly but can also be set using the Link Text field at the top of this editor.
Site Page Links
This type of web page link is probably the most common you will encounter and is the default for new links. With this link type, a visitor will be sent to a different page on the same website. To create a site page link:
Step 1.
Open The Link Editor
With the page in edit mode, select the EDIT tab and select the link you wish to modify. Depending on the component, sometimes the link editor can be opened directly, in the Menu Editor or in the Carousel Editor. Each path is different, but they all begin by selecting the component to be changed and selecting and editor in the upper left corner.
Step 2.
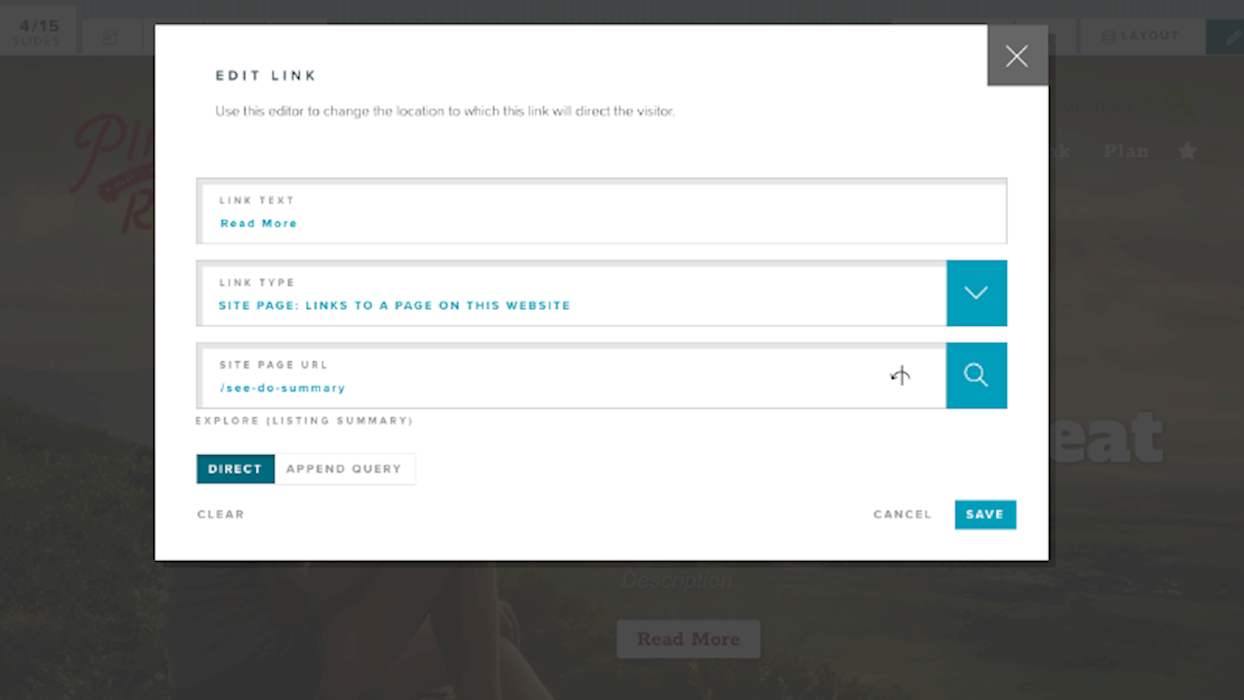
Configure the Link Text
Set your text or description for this link. The use of this text will vary widely by component from labels, buttons, menus and so on. In rare occasions the text is not displayed on the page at all, but it is still good practice to add a description.
Step 3.
Select Site Page Link Type
From the link type drop list, select the SITE PAGE link type. Different link type will add different options for configuration (see the list above). This link type will display a place at the bottom of the page where the page URL can be added.
Step 4.
Set the Site Page URL
To send the visitor to the right page, enter the relative URL path beginning with slash (/). The relative URL is the part of the path after your domain. For example, the relative URL of www.mysite.com/events is /events. If you do not know the URL for the page you want to use, click the search button on the right side.
Step 5.
Find Your Site Page
By selecting the search button in the page URL bar, you will open the Select Page window. This window provides two methods of locating a page on your website. The first is by title under the SEARCH tab. The second is by page hierarchy in your site tree using the BROWSE tab.
Step 6.
Optionally Append a Query
Lastly you can append a query to the URL for special cases. A query is the part of the URL that begins with a question mark (?). For example /about?utm_source=direct has query of (utm_source=direct).
Once you have completed the link settings, click SAVE.
External Page Links
This type of web link is probably the second most common you will encounter. With this link type, a visitor will leave your website and be sent to a page on a different website. ArchiTECH will typically open this type of link in a new browser tab. To create an external page link:
Step 1.
Open The Link Editor
With the page in edit mode, select the EDIT tab and select the link you wish to modify. Depending on the component, sometimes the link editor can be opened directly, in the Menu Editor or in the Carousel Editor. Each path is different, but they all begin by selecting the component to be changed and selecting and editor in the upper left corner.
Step 2.
Configure the Link Text
Set your text or description for this link. The use of this text will vary widely by component from labels, buttons, menus and so on. In rare occasions the text is not displayed on the page at all, but it is still good practice to add a description.
Step 3.
Select External Page Link Type
From the link type drop list, select the EXTERNAL PAGE link type. Different link type will add different options for configuration (see the list above). This link type will display a place at the bottom of the page where the page URL can be added.
Step 4.
Set the External Page URL
In the destination url field, add the full URL you would like the browser to open when a visitor selects this link. This usually begins with http:// or https://. When selected this link type will typically open in a new browser tab.
Once you have completed the link settings, click SAVE.
Child Pages (Dynamic)
Child page link types are specifically intended to automatically build a list of links. This saves you the effort of manually updating menus and other navigation elements as pages change on your website. This type of link is especially useful for listing the child pages of a given page for in page navigation components.
Step 1.
Open The Link Editor
With the page in edit mode, select the EDIT tab and select the link you wish to modify. Depending on the component, sometimes the link editor can be opened directly, in the Menu Editor or in the Carousel Editor. Each path is different, but they all begin by selecting the component to be changed and selecting and editor in the upper left corner.
Step 2.
Select Child Pages Link Type
From the link type drop list, select the CHILD PAGES link type. Different link type will add different options for configuration (see the list above). This link type will display a place to select the parent page, a list of pages types to include and the order in which to display them.
Please note that the child pages link type is not available in all components. Only components that can support this feature will show this option in the link editor.
Step 3.
Select the Parent Page
Select the parent page whose clild pages should be included in the menu list. If you leave this field empty, child pages of this page will be included. Enter the URL of the parent page. If you do not know the URL for the page you want to use, click the search button on the right side.
Step 4.
Select The Page Types To Include
From the list of page types, select the ones you would like to appear in the menu list. Only child pages of the selected type will be included, unless you make no selections. If all types are set to no, then all child pages are included in the menu list.
Step 5.
Set the Order of the Menu Links
The last option in the menu allows you to control the order of the menu links for the clild pages as they are added to the menu list. The options include: By Page Order, Alphabetical and Chronological.
Once you have completed the link settings, click SAVE.
LAST UPDATED: 9/26/2019